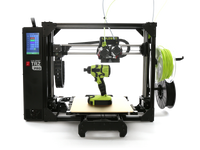
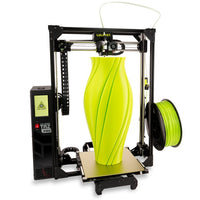
Replacing The Hot End on Your Lulzbot Taz Printer

How to replace the hot end on your Lulzbot Taz 3D printer
At Print Your Mind, we are dedicated to providing the best possible support and assistance to our customers. 3D printers require occasional maintenace and up-keep, so this tutorial will assist you when it comes time to replace the hot end on your Taz printer.
Benefits of this upgrade:
- replace a broken or failing hot end
- achieve higher quality prints by returning your extruder to all of it's former, factory-fresh, glory
Requirements for the upgrade:
Purchased parts:

Tools and hardware:
- allen wrenches or hex keys (H1.5, H2.5, H3.0)
- dental pick (or other fine-tipped tool)
- cable ties
- scissors or cable snips
Detailed steps:
1. Unplug your printer's power cable from the wall. Safety first!
2. Open the parts kit and lay out the parts. We will be using the pre-wired harness and reusing the existing mounting plate, so we will keep the extra plate and separate wires as spares.

3. Disconnecting the wire harness for the hot end by separating the two halves.

4. Remove the top mounting screw using a 2.5mm hex key.

5. You can now lift the hot end up and away from the X-carriage.


6. Remove the zip tie(s) holding the cable wrap in order to expose and separate the wires.


7. Next remove the front extruder fan using a 2.5mm hex key.

8. Remove the right side cooling fan using the 2.5mm hex key, and then remove then fan duct underneath the fan using a 1.5mm hex key.


9. Repeat the same for the left side cooling fan and duct,


10. With the fans and ducts out of the way, remove the two screws holding the mounting plate to the extruder housing.

11. Snip the zip tie holding the fan wire, being careful not to catch the wire itself.

12. Disconnect the cable to the stepper motor.

13. You should now have a de-constructed hot end. :)

14. Remove the screw holding the ground wire to the heating block. If the screw is stuck in old melted plastic, a heat gun may be needed to soften the plastic and allow the removal of the screw. Be careful not to damage the wire or the connection terminal at the end of the wire.

15. Remove the fan wires from the harness using the dental pick that came with your printer (or other such pointed object). The fan wires are the right-most ones when looking at the side of the harness with the Lulzbot triangle.


16. Next, repeat the procedure to remove the heater wires (3rd from the left of the harness).


17. Similarly, remove the 4 wires from the new hot end's wire harness.


18. To start the reassembly, install the ground wire into the top screw hole of the new heater block.

19. Before inserting the wires from the new hot end into the existing wire harness, ensure that the small flap is raised. If was flattened during the removal from the new wire harness, gently pry it back up so that it will "lock" in place in the wire harness.

20. Insert the heater wires into the holes that are 3rd from the left of the harness when looking at the side with the Lulzbot triangle (polarity doesn't matter). Follow this with inserting the fan wires in the right-most holes of the harness (black on the bottom, red on top).


21. Prepare the extruder assembly by inserting a length of filament so that at least an inch is exposed at the lower end. This will serve to align the hot end with the filament path.

22. Using the exposed filament, slide the new hot end up into place under the extruder assembly using the mounting plate (either the new one from the kit, or the old one if it's not damaged). Secure it in place using the 3.5mm hex screws.

23. Place the cable wrap around the wires, and secure with zip ties.

24. Reattach the stepper wire to the motor. The connector is keyed so that it will only fit one way.

25. Reattach the center cooling fan.

26. Secure the left side fan wire under the assembly using a zip tie.

27. Find the side fan shroud with the X axis end stop attached to it. Mount this to the right side of the extruder assembly, followed by the cooling fan that wasn't zip tied to the bottom of the assembly.


28. Repeat the procedure for the left fan shroud and cooling fan.


29. You now have a fully assembled new hot end.

30. Mount the hot end back on the printer by lowering the assembly on the lower mount of the X carriage and secure with the screw through the top mounting hole.
Enjoy your new hot end, and happy printing!
This guide is licensed CC BY-SA 4.0 International. LulzBot® is a
registered trademark of Aleph Objects, Inc.

