
Ultimaker 2+ or Extended+ - How to change the nozzle with an Olson block


How to change the nozzle on your Ultimaker 2+ or Extended+ with an Olson block.
This tutorial is meant to walk you through the simple process of changing the nozzle on your Ultimaker 2+ or Ultimaker 2 Extended+ 3D printer. The process is very simple and will only take a few minutes.
Tools you will need:
- Ultimaker Nozzle Kit - included with the sale of every Ultimaker 2+ and Extended+
- Needle nose pliars
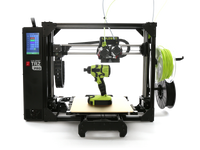
- Ultimaker 2+ or Extended+ 3D printer


Step 1
There are a few different ways you can go about this process. In this guide we will walk you through the easiest way of doing this. The first step from the main menu is to select "Material" and then select "Change" to start.

Step 2
The nozzle will now heat and the material will be pulled back through the clear bowden tube.


Step 3
Once the filament has been retracted out of the bowden tube you can grab your small wrench from the Ultimaker nozzle kit. Use this to loosen the nozzle making sure to only grab the brass nozzle when screwing.


Step 4
Now use a pair of pliers to unscrew the nozzle until it can be completely removed. Remember that the nozzle is still being heated so do not touch this with your hands as it will be very hot.

Step 5
Now with the pliers grab the new nozzle you wish to install and start to slowly screw it back in the same place your just removed the previous nozzle from. Remember that the heating block is still on and the nozzle will get hot quite quickly. Do not try to do this with your hands.

Step 6
Finally, use the small wrench to tighten the new nozzle. The Olson block was designed to work with the nozzles only finger tightened. Do not over tighten the nozzles as this can damage the machine.

This is what the new nozzle should look like once installed.


Step 7
Now select "Ready" on the printer and select the material you have installed. You will have to load the filament once again on the back of your printer.

You are done! Now just remember to enter the new nozzle size you are using in Cura and you are ready for your next print.